Lighting plays a central role in photography. Many skilled photographers regard it as the most crucial factor when capturing an image. The quality and direction of light determine the mood, clarity, and overall impact of a photograph.
The Importance of Lighting
Photographers have long understood that light makes the subject visible. Great painters such as Caravaggio, Rembrandt, and Rubens paid careful attention to light in their work. Their paintings capture the dramatic interplay of light and shadow, a concept that has been carried into photography.
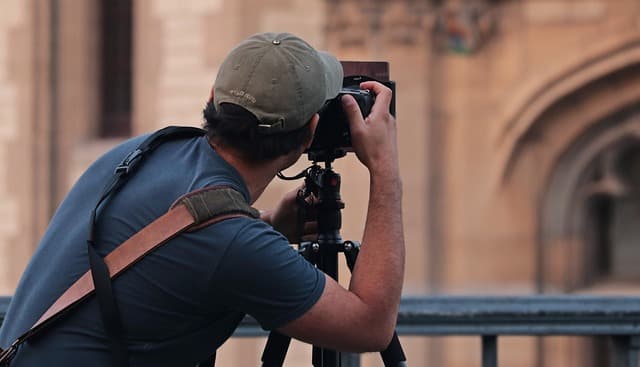
Photographers are often faced with a choice between using a phone camera with a good lighting setup or a professional camera without one. The ability to manipulate light can improve a portrait or a street scene. It is not the camera that makes the photograph but the light falling on the subject.
- A strong light source can highlight details.
- Shadows create contrast and depth.
- Reflected light can brighten a subject.
The Way Light Is Perceived
Human vision is attuned to differences in light intensity. The eyes detect contours and abrupt changes in lighting better than smooth transitions. This principle is vital when composing a photograph. Photographers need to think of a scene as a series of areas with varying brightness.
Local Contrast and Visual Illusions
A notable effect in photography is local contrast. A subject may appear brighter or darker than its surroundings based solely on the relative difference in light. For example, a dark object in a shadow can stand out if it is brighter compared to the surrounding area. This phenomenon explains why a subject illuminated by a well-placed light source draws immediate attention.
A table summarising the visual perception of light is provided below:
| Aspect | Description |
| Contours | Sharp edges capture the viewer’s eye |
| Local Contrast | Differences in brightness make subjects stand out |
| Gradients | Gradual changes may not be as noticeable |
| Relative Brightness | The subject’s light relative to its background matters |
Techniques for Capturing Light
Photographers use various methods to control and enhance light. Both natural and artificial light can be used creatively to improve the final image. Understanding these techniques is essential to capture the intended effect.
Natural and Artificial Light
Natural light offers a soft and even illumination when the conditions are right. It is common to seek a moment when the subject is naturally well lit. However, this is not always possible. In many instances, photographers rely on artificial light sources. A flash or reflector can be used to brighten a subject when natural light is insufficient.
When shooting against the sun, it is useful to have a light source to balance the strong shadows. This approach prevents the subject from becoming lost in the darkness. By combining natural backlighting with a side light or flash, the subject’s features can be defined clearly.
Using Contour Lighting
Contour lighting is a technique that highlights the edges of the subject. The human eye perceives sharp contrasts more effectively than smooth gradients. By positioning a light source behind or beside the subject, the contours are accentuated. This technique adds depth and dimension to portraits.
For example, a photographer might use a reflector to bounce light onto a subject’s face while shooting against a bright background. Such a setup enhances the subject’s features without compromising the natural play of shadows and light.
A brief list of benefits provided by contour lighting includes:
- Emphasis on facial features
- Increased depth and dimension
- Enhanced separation between subject and background
Post-Processing for Better Lighting
Even with careful planning, the raw image may not fully capture the intended effect of the light. Post-processing plays an essential role in refining the photograph. Tools within editing software allow the photographer to adjust brightness, contrast, and shadows.
Basic Editing Tools
Editing software offers a range of basic adjustments that can transform a photograph. Adjustments to white balance, hue, exposure, highlights, and shadows can create a significant impact. Changing these settings subtly can give a photograph a new mood or even simulate a different time of day. For instance, a photo taken in daylight can be modified to resemble a scene lit by the full moon.
The Adjustment Brush Tool
One of the most useful tools in photo editing is the adjustment brush. This feature allows for selective editing of specific areas within a photograph. By increasing contrast or brightness only on the subject, the photographer can guide the viewer’s attention effectively.
A photographer may choose to brighten only the face in a portrait or darken the background to make the subject stand out. The tool is also useful for correcting uneven lighting in a shot. It is not uncommon for a photographer to apply several passes with the adjustment brush until the lighting appears natural and balanced.
A simple list summarises the adjustment brush steps:
- Select the adjustment brush tool.
- Identify areas with insufficient or excessive light.
- Adjust brightness and contrast as needed.
- Compare before and after images.
- Save the refined image.
Practical Recommendations
Achieving the desired lighting in photography requires both technical skill and a good understanding of how light interacts with subjects. Below is a table that summarises techniques and their expected results:
| Technique | Outcome | When to Use |
| Natural Light | Soft, even illumination | Outdoor portraits and landscapes |
| Artificial Light | Controlled brightness and contrast | Low-light conditions or against strong sunlight |
| Reflectors/Flash | Balanced light with reduced shadows | Portraits and street photography |
| Contour Lighting | Emphasis on subject’s edges and features | Creating depth in portraits |
| Post-Processing | Fine-tuned light and shadow adjustments | To enhance or correct captured images |
Photographers often find that the best images result from planning and real-time adjustments. They select a background that contrasts with the subject. They choose a location where the light naturally enhances the subject or use additional light sources. A well-lit photograph is not the result of expensive equipment but of careful observation and adjustment.